Wedding Dress Pt 5: Engineering the Gown & Final Touches

In part four, we started actually making the dress, and seeing the progress come to life! But before we continue with the feel goods, let me take you back to the final drama I had over the dress right before the construction with the main fabric actually started.

A boning example from Susan Khalje’s Bridal Couture book.
Questioning Everything
When I felt how heavy the final dress pieces were cut out, I had a minor melt down. There was one last piece of the design that I had been worried about the entire time and not quite figured out. To bone or not bone the dress? So much of the research I had done about couture garments and especially wedding gowns said that you really must create a boned inner structure to hold up the dress. From a physics perspective, let’s chat:
With a normal dress, the weight is held by the shoulders and hangs down, right?
With the majority of formal gowns, the weight is held by a tightly fitted bodice, sometimes with boning or an inner corset, sometimes not even noticeable underneath a lining. The weight hangs from here and the shoulders are left free!

However, very few of this style of dresses I had tried on in shops had been boned. Maybe boning is more necessary for women supporting bigger busts? Would the little thin spaghetti straps I had planned really hold up the entire weight of my -quite heavy- beaded fabric? Would the dress fall apart under pressure? I was doubting everything. I had put so much time into this design and style. And, frankly, drafting a corselet like the way Kat Makes or Untitled Thoughts did, looked hard.
Would all this work go to waste and be a huge embarrassment if my dress fell apart under stress on the wedding day??
The one piece of structure that I had been planning on is called a waist stay. This is essentially a tight band around the natural waistline that has it’s own hook and eye closures and is connected only to the seam allowances of the main dress. This helps hold the dress up from the waist. But would this little waist stay be enough? So smol. Would the weight of the beads and dress just pull the whole thing down on the dance floor and the straps just rip right out?!? For the first time, I’m understanding why so many people are intimidated by projects like this one. Not sure whether to follow my gut and skip the boning or not, I turned to the sewing community on Instagram with a cry for help and feedback.
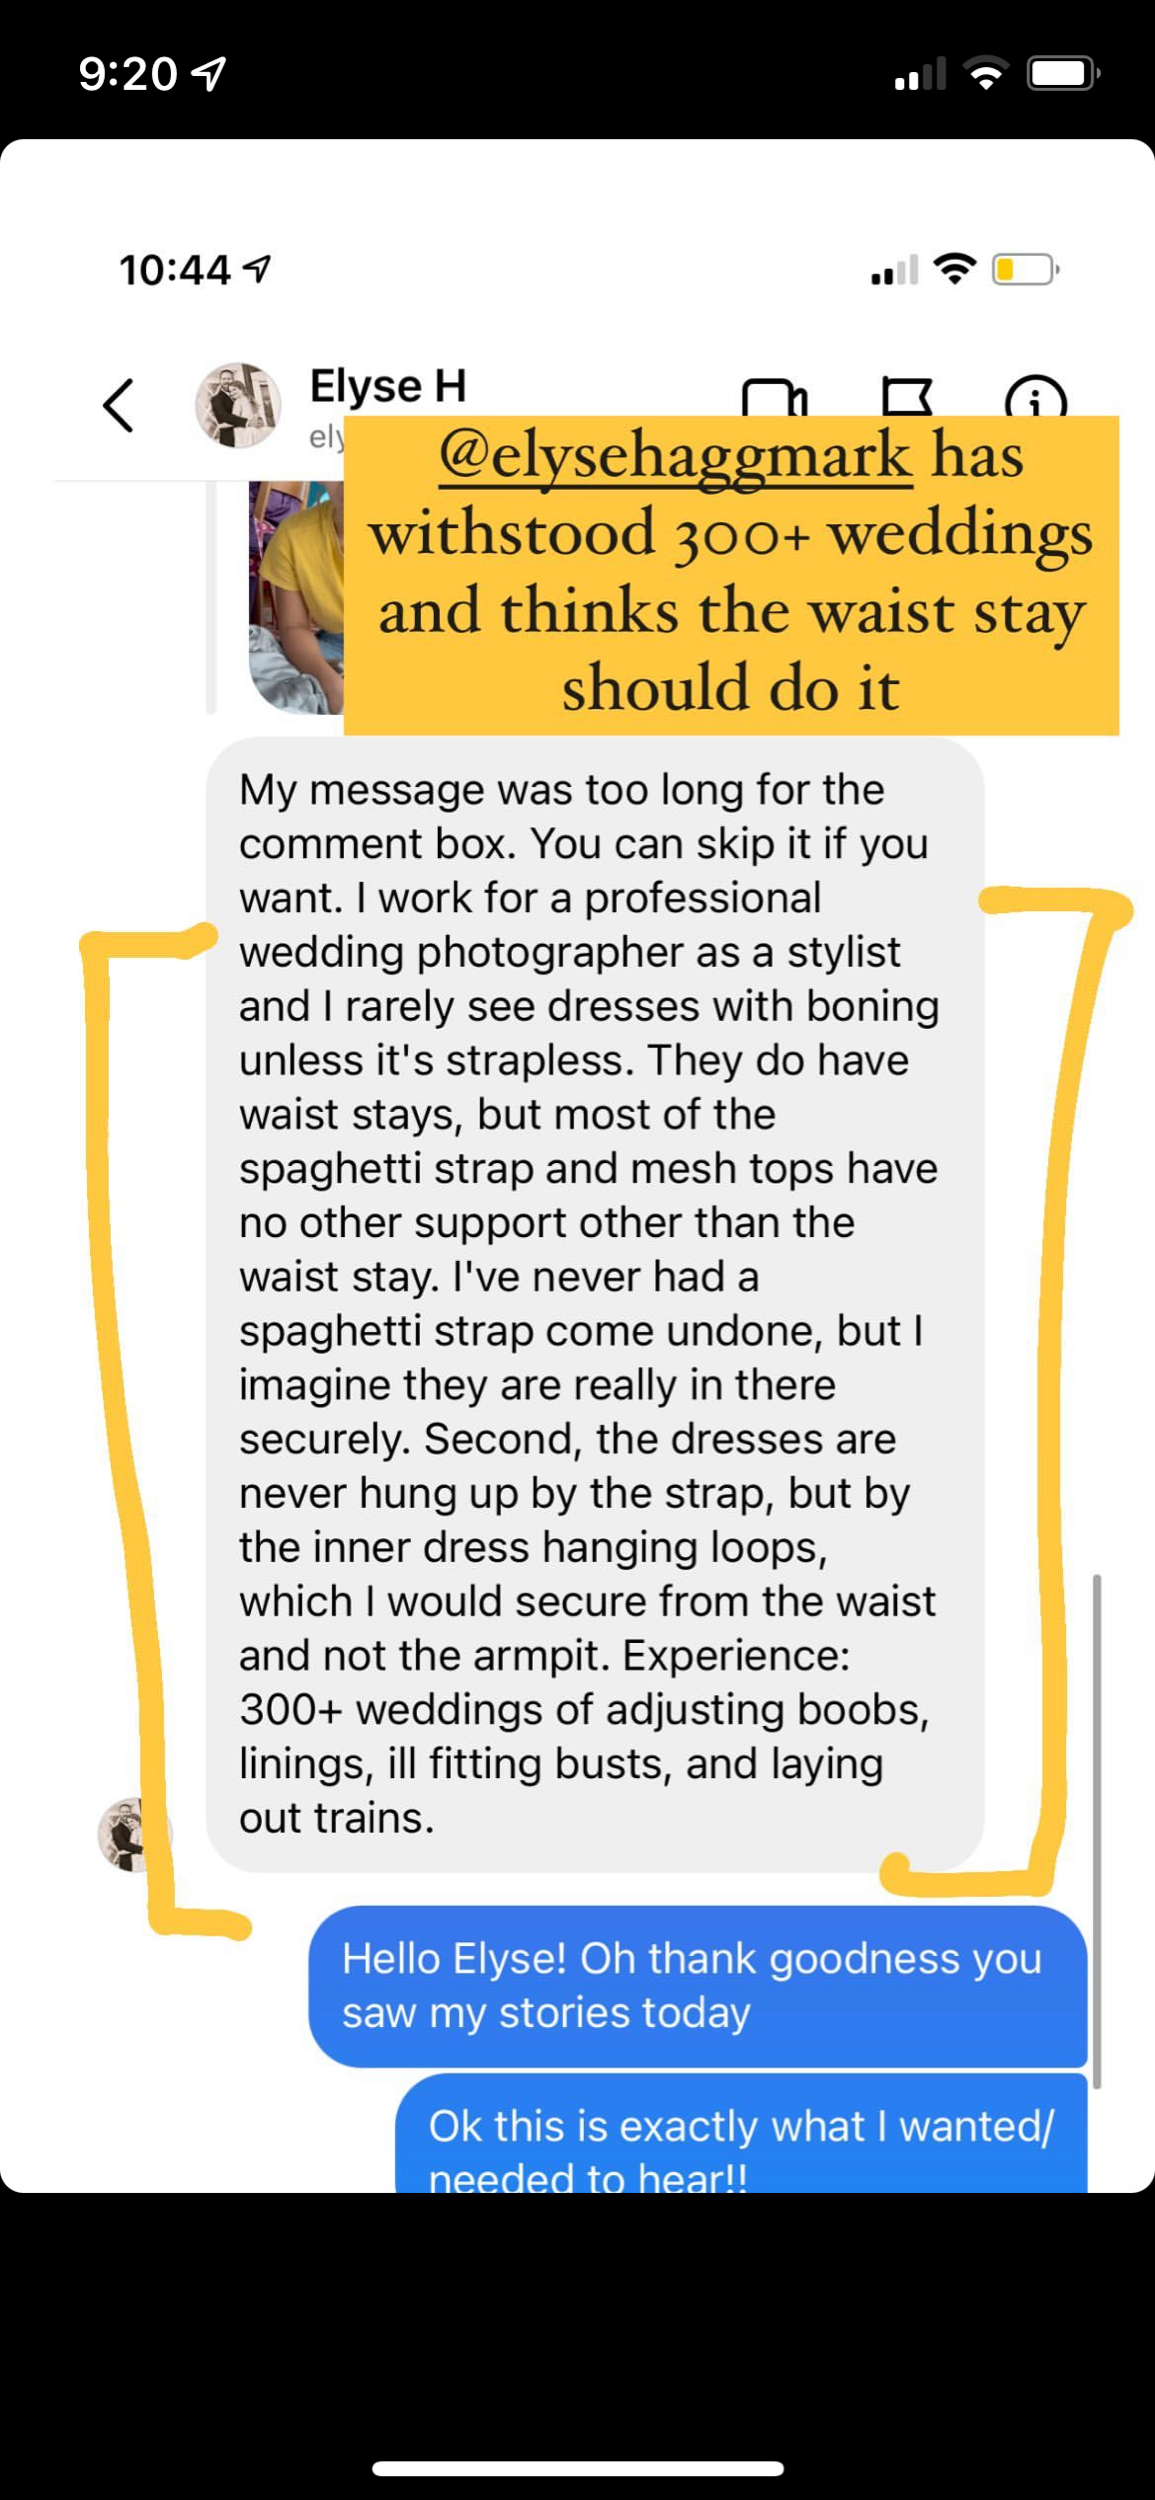
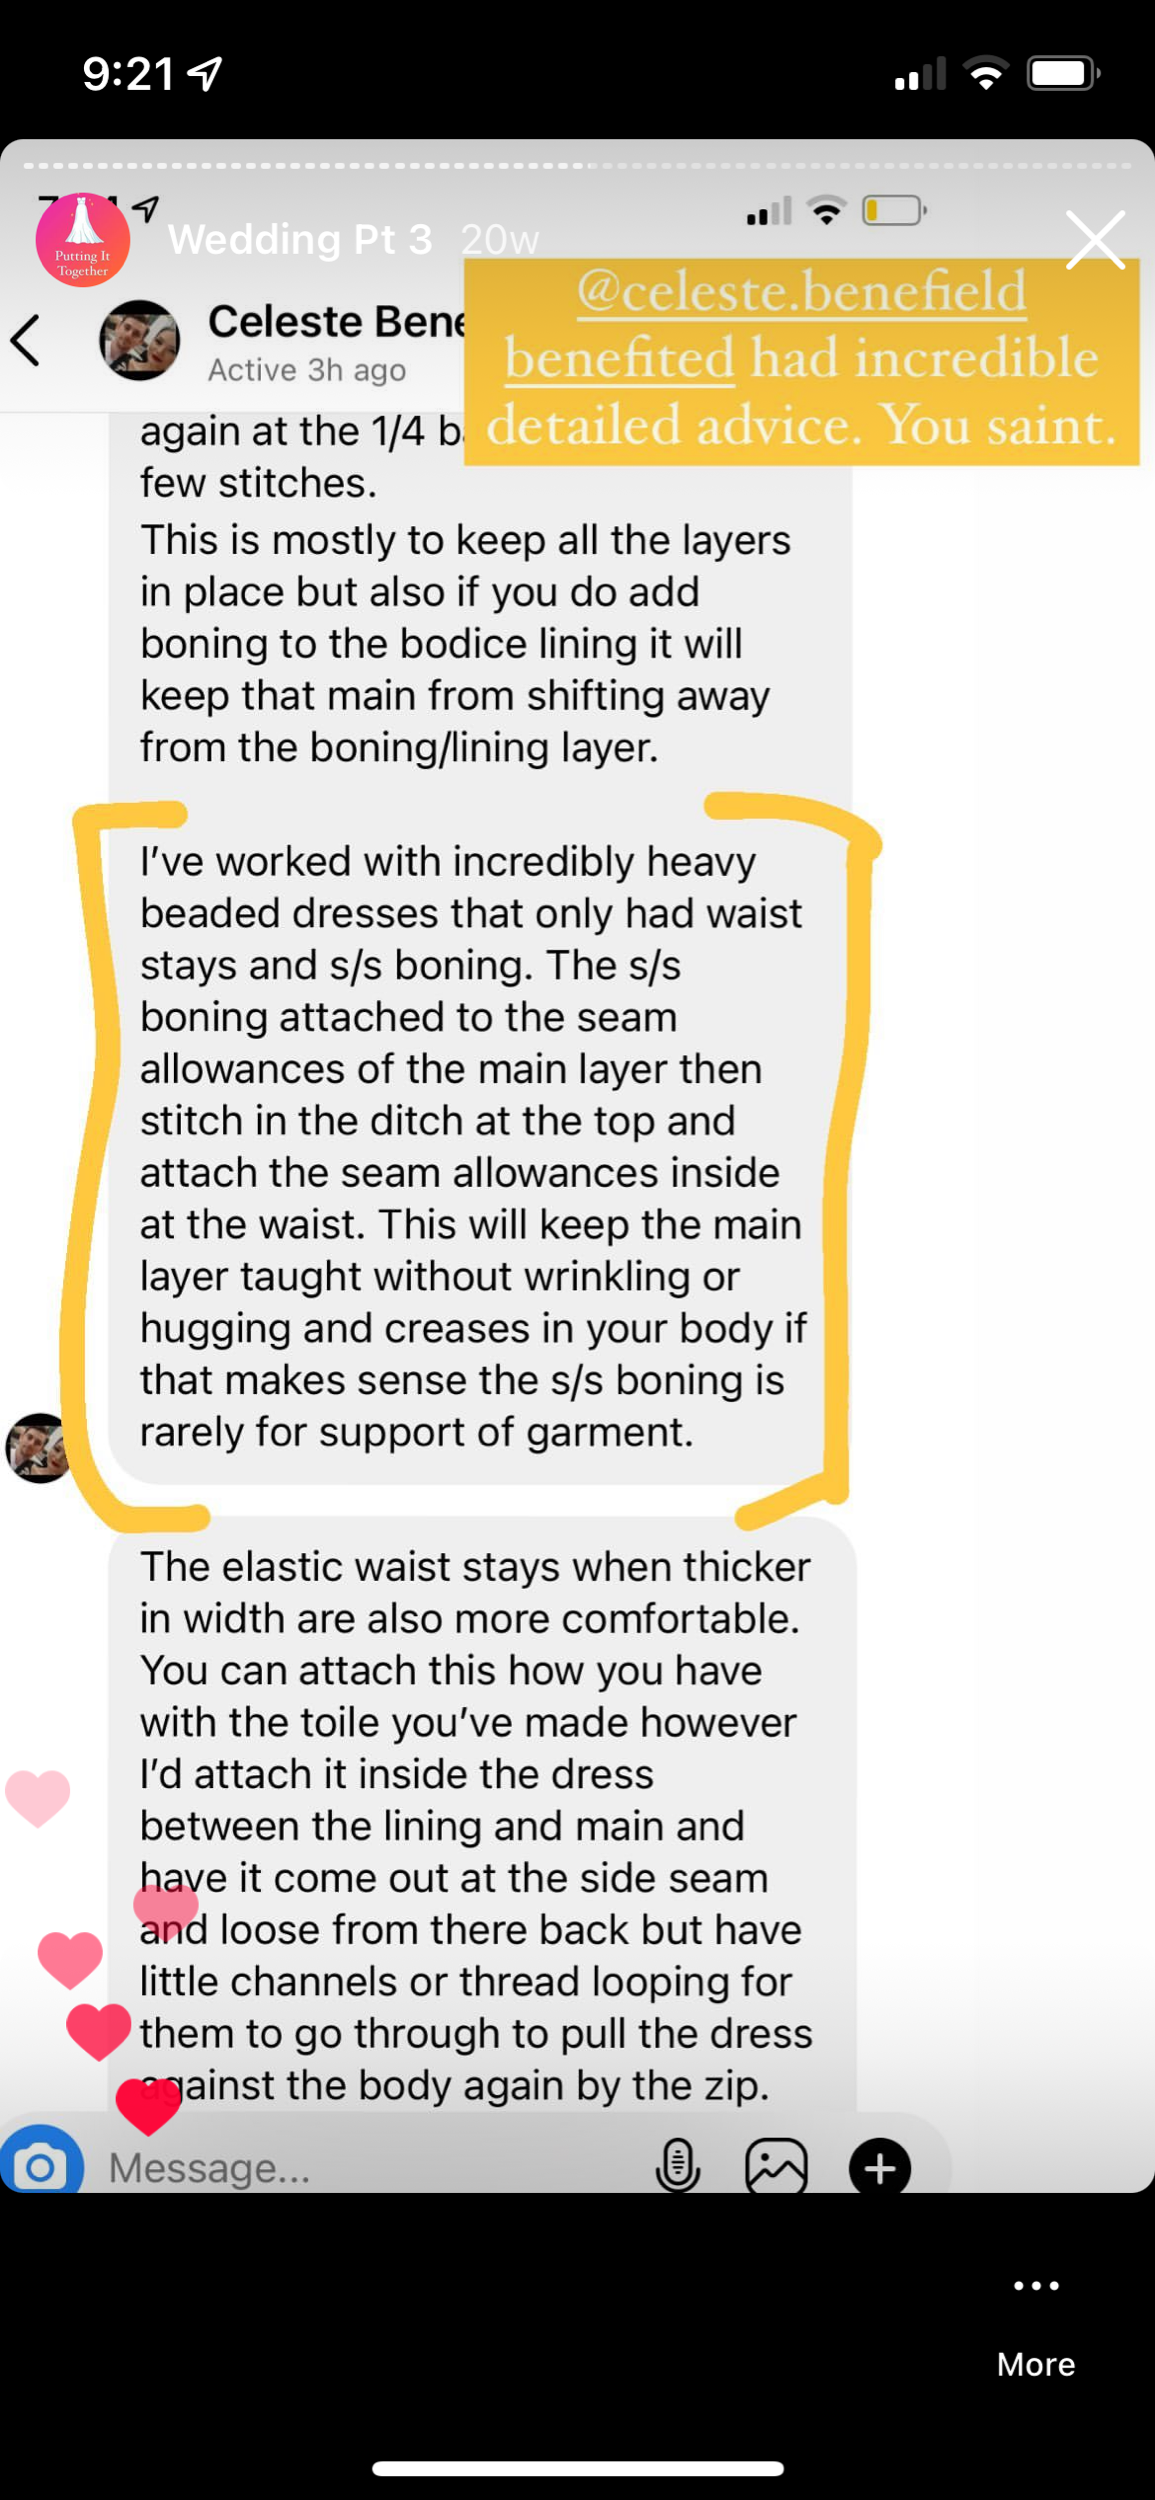
The jury was split for sure, but enough of you reassured me that a waist stay should likely distribute enough weight off the shoulders, or shared stories of your heavy dresses with little straps and no structure at all that hadn’t fallen apart on the wedding day. Ada of @i.hope.sew even went into her closet and sent me a full video inspecting the construction of her wedding gown 🥹 A lot of folks thought I should bone it, but enough also reassured me that it’d probably be fine. So I decided to listen to my gut and skip it and see how she’d hold.

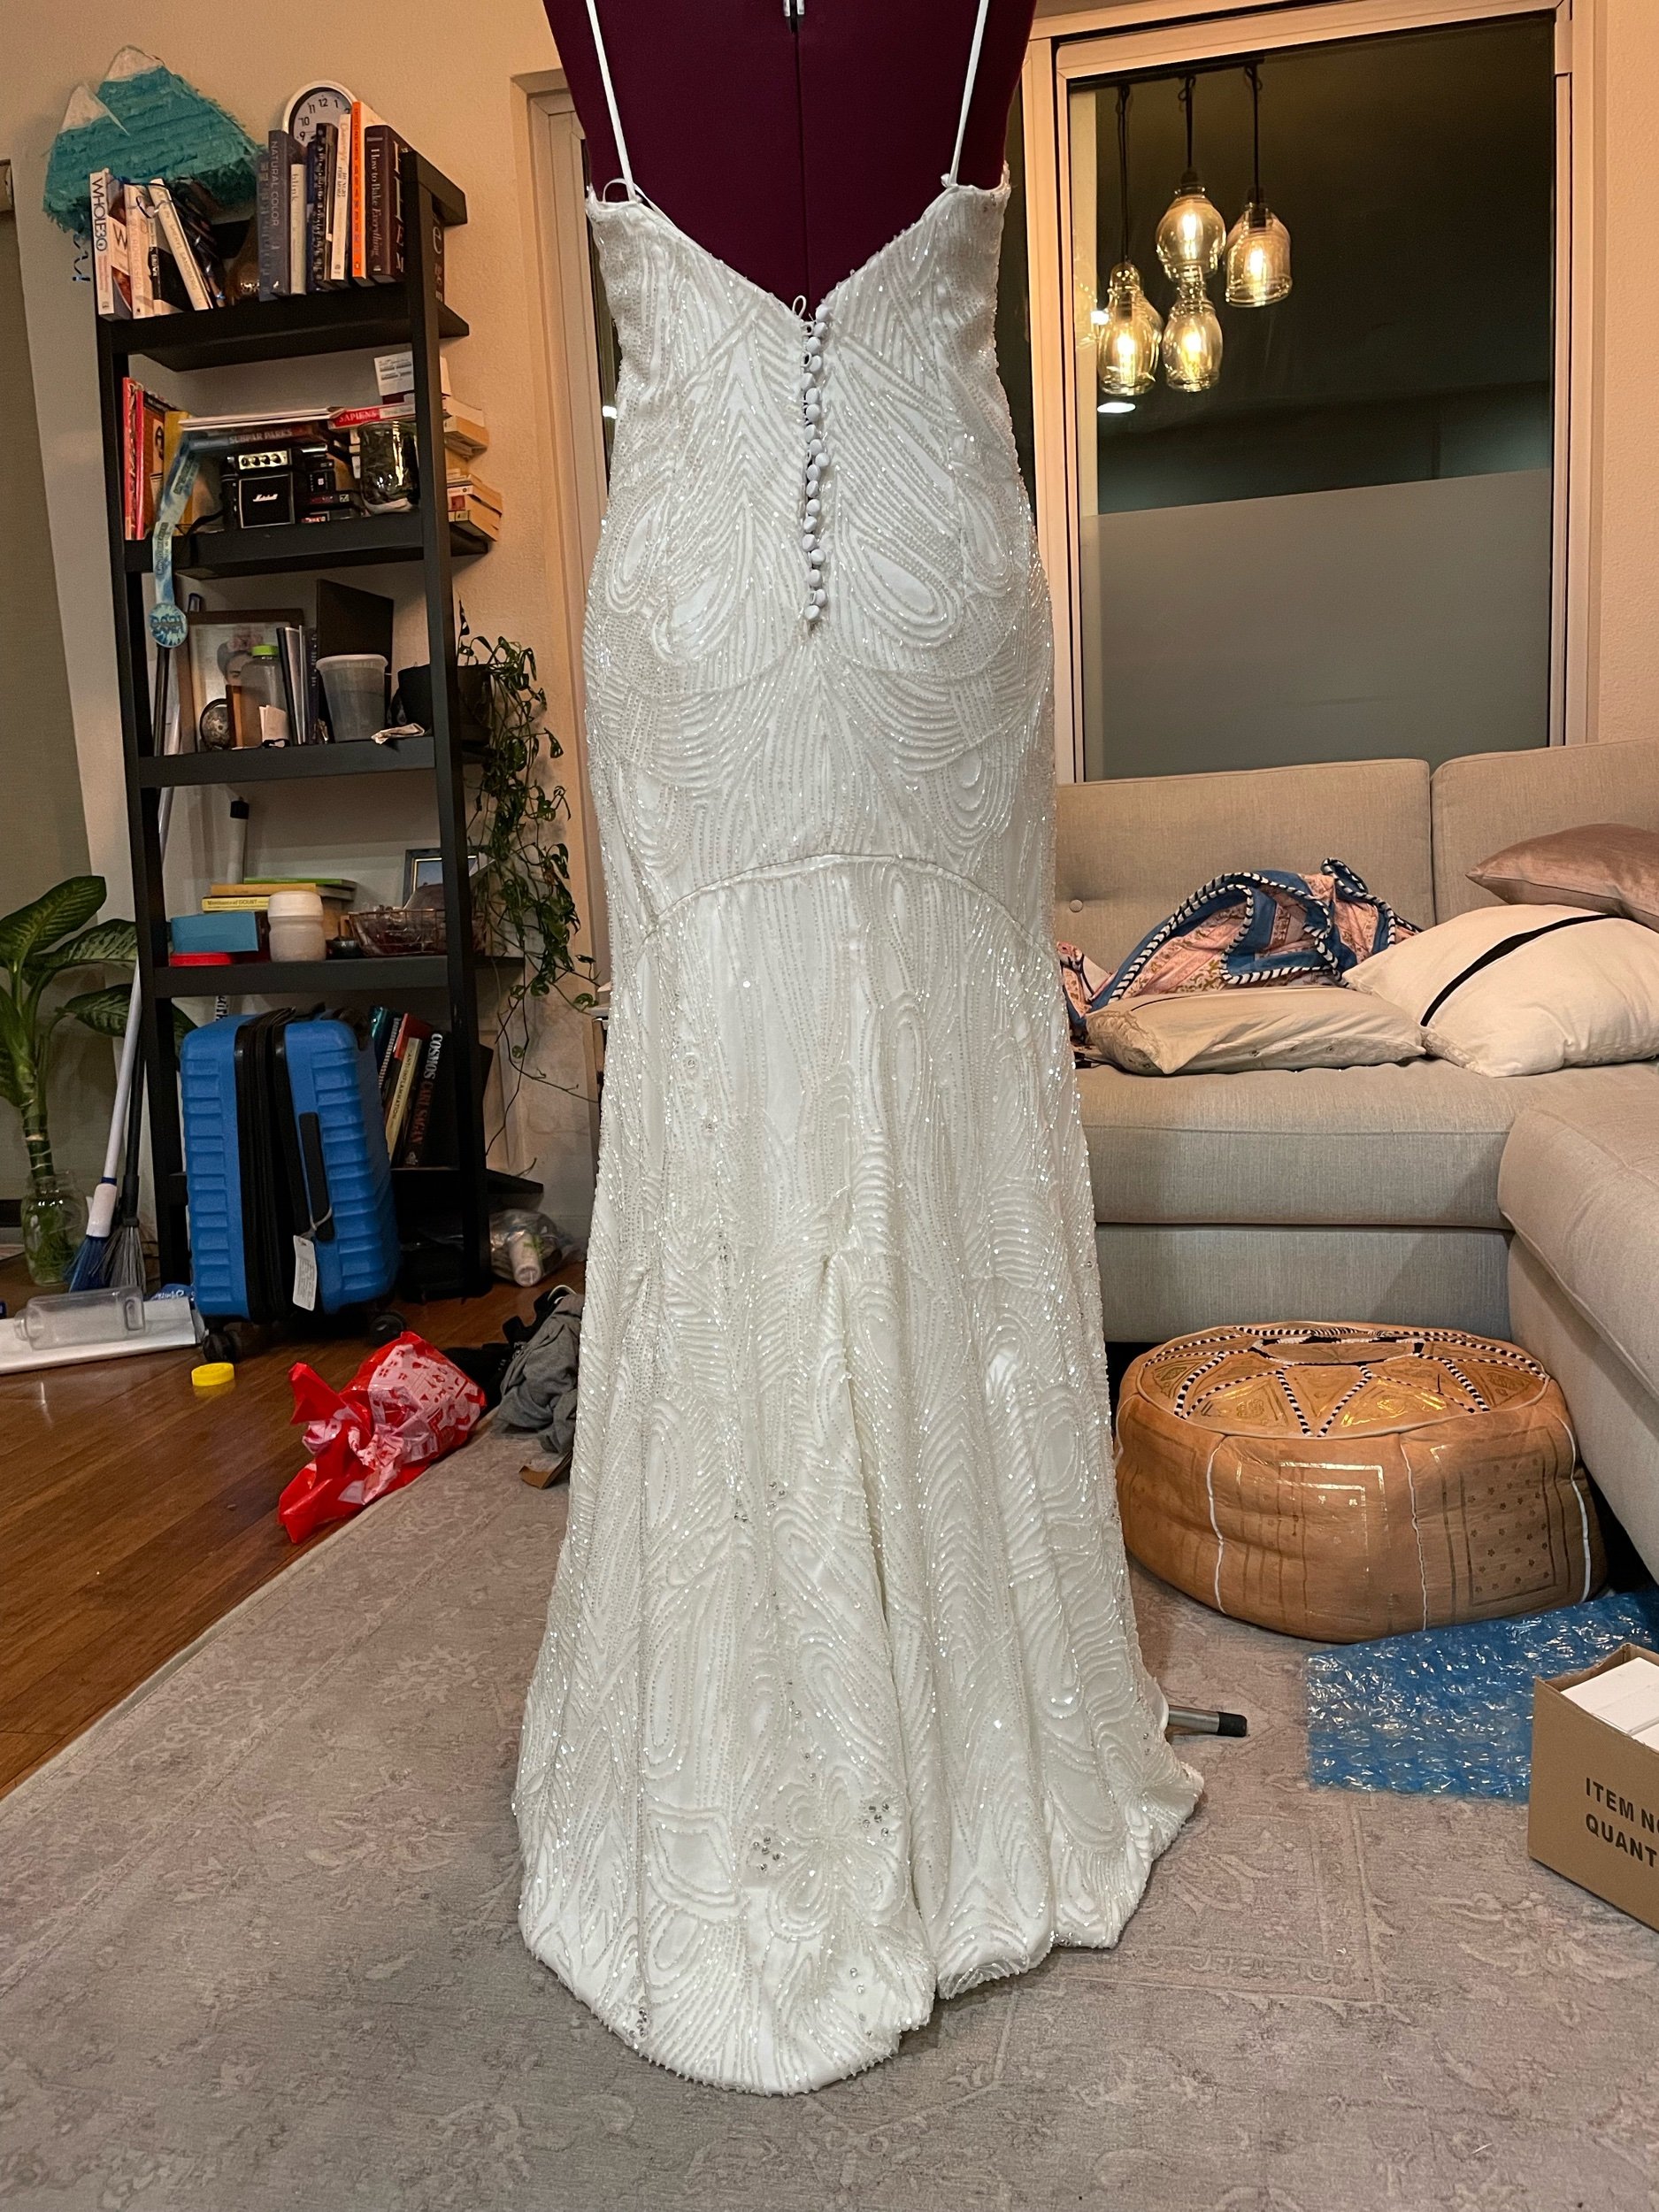
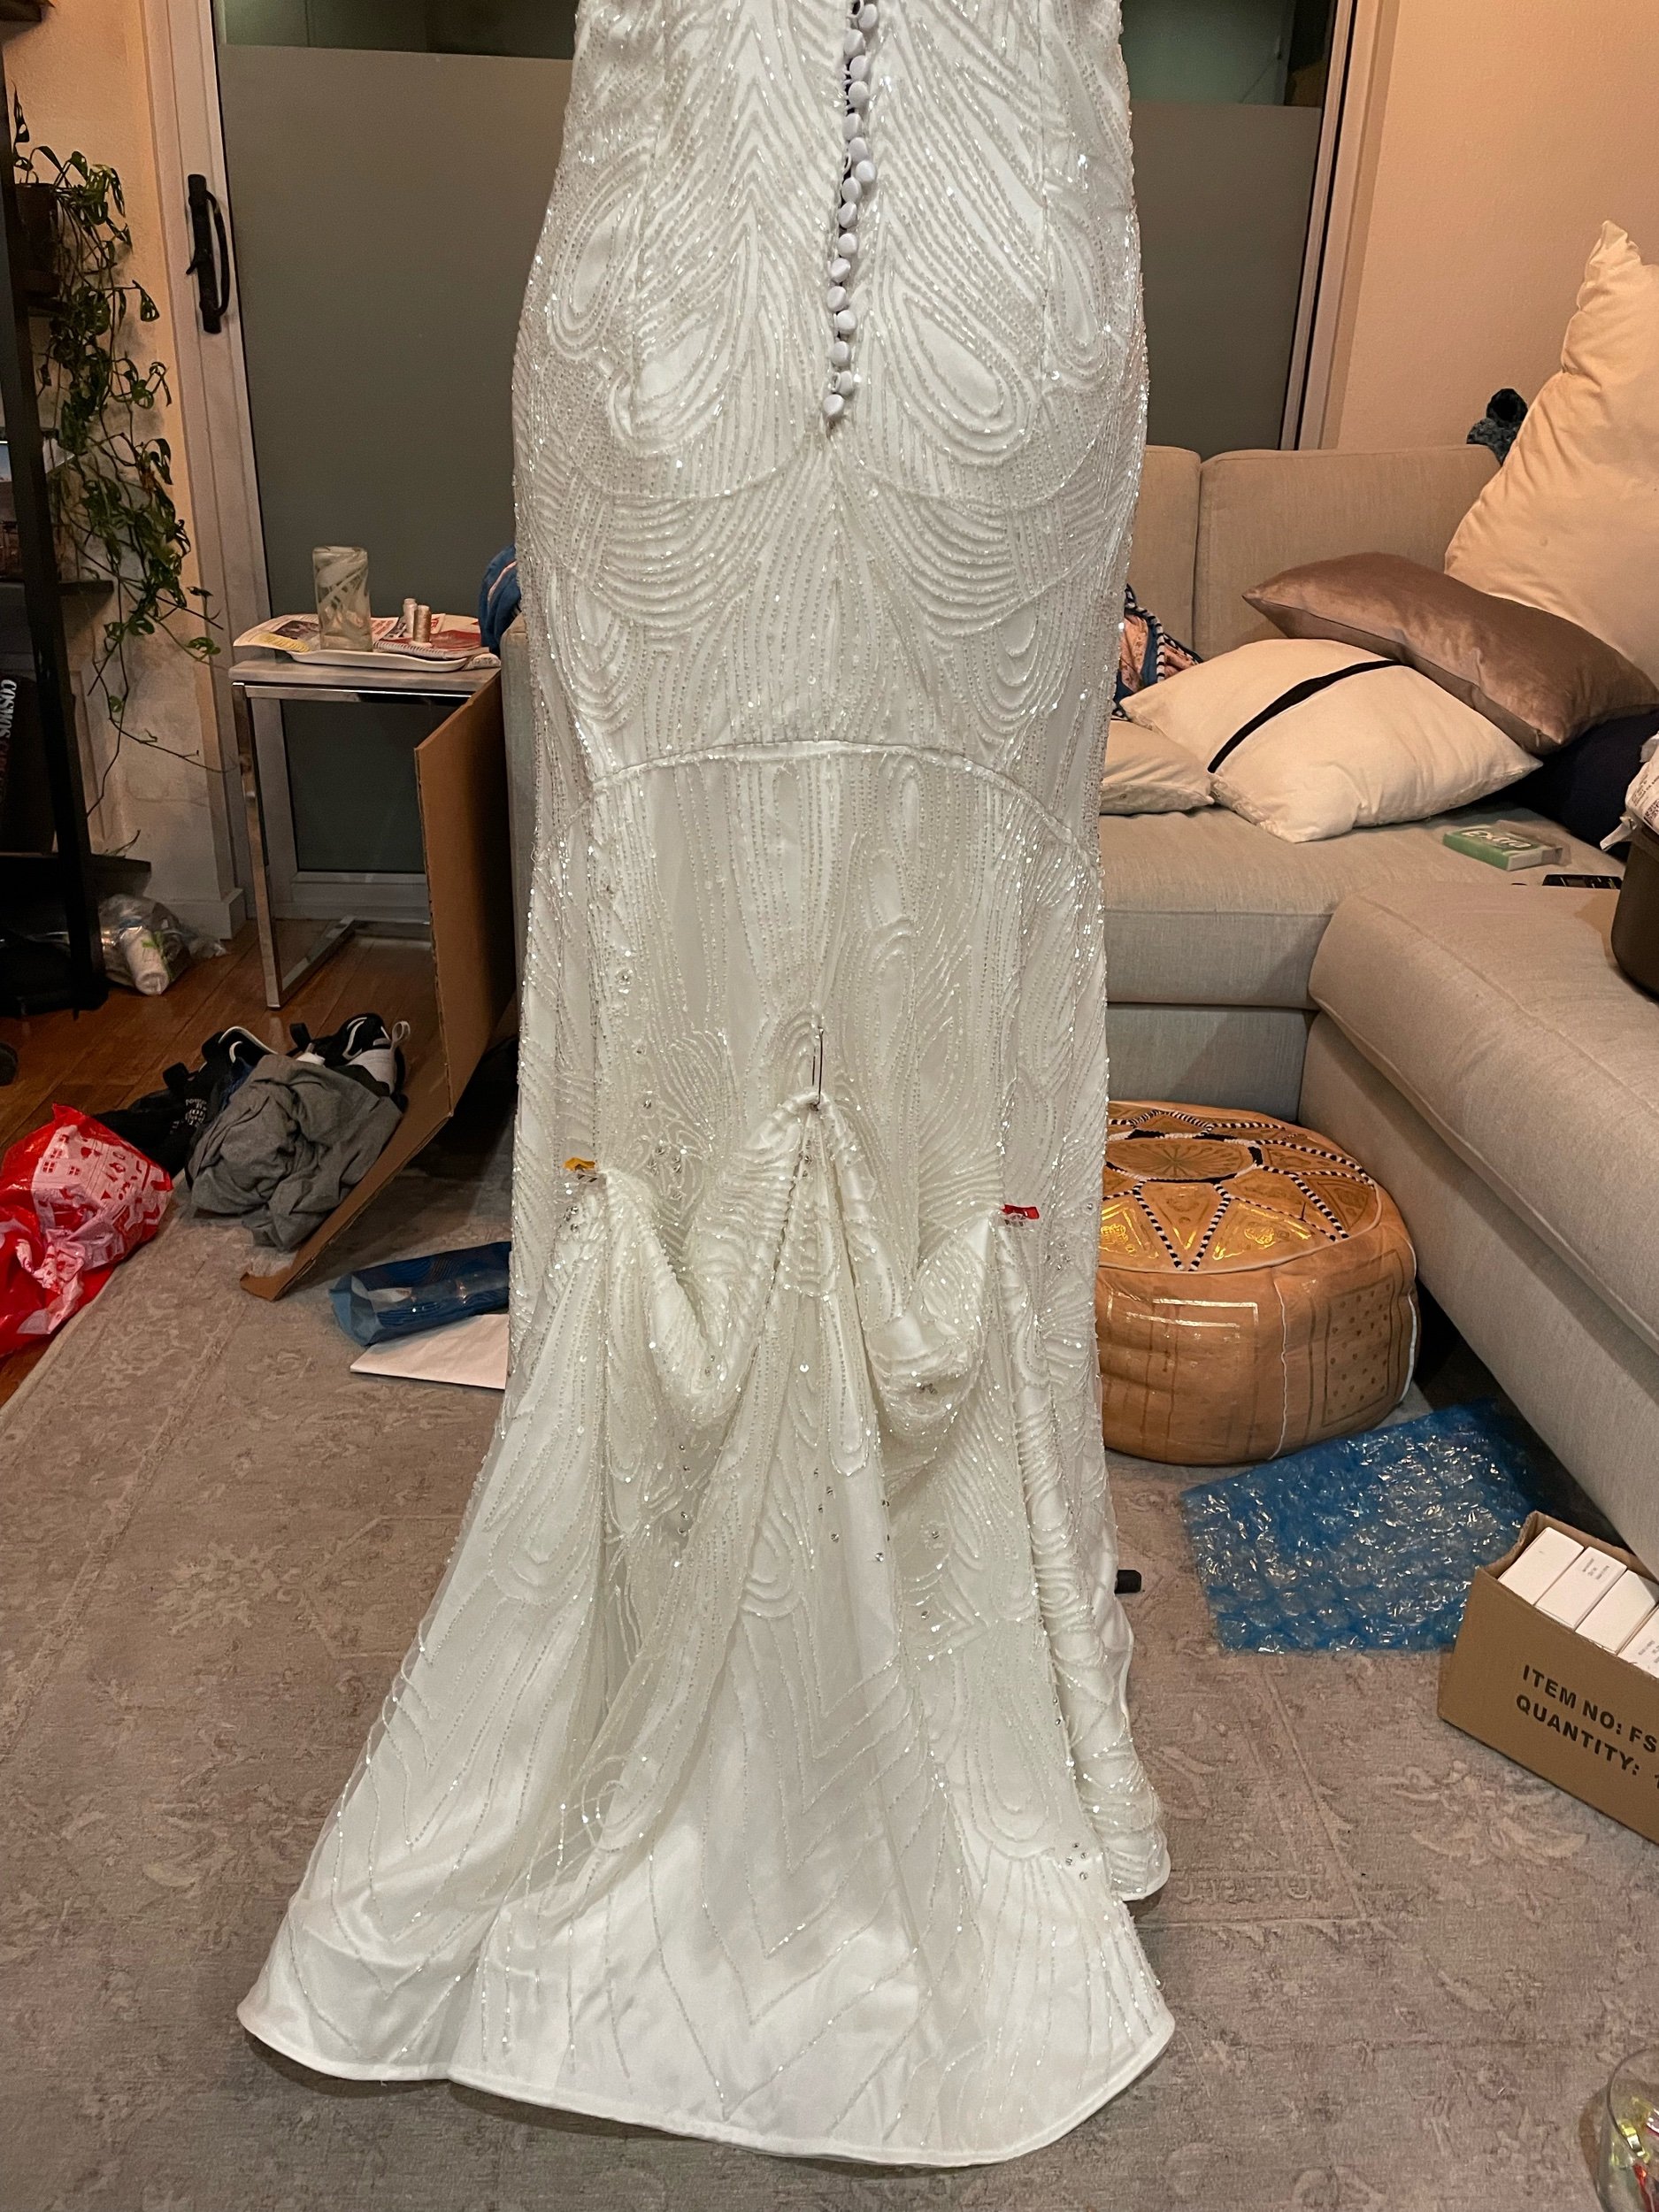
The waist stay
The waist stay before the lining is inserted. It’s only attached at the seam allowances of the main dress, then the two back pieces fit through gaps left in the side seams of the lining. The hook independent of the buttons of the dress.
Sewing skills and insecurities are two separate things.
I also had another realization. That my insecurities were talking louder than my skills. The wedding dress wasn’t just going to 💨poof💨 fall apart into thin air like Cinderella at midnight. I needed to have more confidence in the judgment call I had already made not to include boning, and all of the work I had already done planning the dress’ engineering. To believe in myself and my skill as a sewist. It wasn’t going to just. fall. apart…. right?
Strengthening without boning
So, we proceeded as planned, but thanks to the feedback of this amazing community, added a few new structural pieces: the waist stay would be made from wide 3in elastic for comfort’s sake. I would add a little bit of encased boning only within the allowance of the bodice side seams, for good measure (and to prevent some drag lines that the final toile had). For extra security, I also added silk organza strips into key seams and inside the straps (this is used in couture sewing almost like interfacing. Silk is very strong and organza is extremely stable). I also think I sewed the straps in like twenty times at each connection point lol.
The final touches
I was so. so. close to the end. I could feel it. My final touches included…
Horsehair braid. At first, the train looked awful. It didn’t hold its shape at all and was just some awkward fabric dragging behind after me, really ugly. I learned that the pros use something called horsehair braid stitched onto the hem of the dress to hold the intended shape. I went with a 2.5 or 3in wide horsehair, but wish I had gone with a more subtle 1 or 1.5 inch one.

Bustling the skirt. I’d never heard of this before wedding gown research. A bustle is essentially a way to take a train and have it fold up and onto the dress, either with ties, buttons, or hook and loop closures. I tested a few styles of bustling the dress and landed on an under-bustle that tucked the skirt train up into the inside of the dress, with hand sewn hook and eyes onto the lining of the back skirt.
Hand me down hem. Early in the process when I told Jason’s parents that I was going to make my wedding dress, they very kindly offered me a special gift. Jason was named for his late aunt Joanna (the first initial is a Jewish tradition), whose dress they’d had in the basement for decades. I did end up using pieces of this dress here or there, but only one piece made it into my final garment. A floral embroidered trim that had been on the hem of Joanna’s dress was stitched onto the lining of mine. A little reminder and homage to that kind woman.

While 90% of the dress was done with about 6 weeks to spare, life got in the way of that final 10%. I was wrapping up the last stitches of the gown the night before we got on the plane to the celebrations in Mexico. I was still stitching my rehearsal dress on the plane, y’all.
The FINAL part of this series is coming soon, you can’t miss it - Part Six: The Big Reveal.